When you are enjoying the temperate weather of spring or fall, it might be hard to imagine the extreme temperatures of the summer or winter that are fast approaching. As nice as it would be to have moderate weather all year long, not everyone is quite so lucky. During the transitional seasons, take the time to go through your weather-proofing checklist to make sure your house will be ready for the season approaching. There are a lot of little tasks you can do to make sure that your house is ready, like making sure that the casings of the windows are tight to keep the hot or cool in, or giving the roof a once over to make sure that they are no leaks or cracks. One important aspect of weather-proofing that people often overlook is proper attic insulation.
If someone wants to keep themselves warm at night, they can wear a hat, which keeps the heat from seeping out of their head. In like manner, attic insulation reduces the transfer of warm air, keeping you toasty warm in the winter, or cool in the scorching heat of summer as it keep the air from transferring with the outside climate. The less air that escapes, the less you will have to pay for your electric bills. Before you can enjoy this aspect of insulation, you have to do a little homework into the different insulation types available to see which would be the most effective and cost efficient for your home.
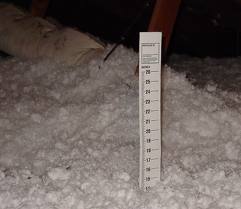
First you will need to determine how much insulation you already have. This is something you can do yourself, but you should make sure to be careful where you step to not go through the ceiling. Also, proper attire would include gloves, safety glasses, thick pants, and shoes with a heavy sole, as many types of insulation are made from fiberglass. Using your trusty tape measure, push through the insulation all the way to the bottom. Many experts recommend that you have at least 4 inches of insulation, no matter where you live, and that it be evenly distributed throughout the attic. For the attic space above rooms that have multiple windows, you may consider placing extra insulation, as those rooms will have greater problems maintaining their temperature.
Once you have determined how much insulation you have, you need to pick which type of insulation will be most cost-effective for your home. The thicker, heavier insulation will trap in the air better. However, they are more expensive grades of insulation, and if you live in a more moderate climate, a thicker insulation may be unnecessary. The US Department of Energy has charts available that can tell you what thickness of insulation you should get according to where you live.
Once you have determined the amount of insulation and thickness you need, there remains one more question to answer before moving ahead with your insulation project. There are two main types of insulation that may be used, depending on how much work you want to do to get the project done. For those who like the quick and easy route, you can go with the insulation that comes in tiny pieces that is blown into place using special equipment. For those who prefer the more hands-on, exact route, insulation also comes in sheets of fiberglass that must be rolled out, measured, and cut to fit.
With these three key decisions made, you are ready to install and enjoy your insulation as you prepare your home for the seasons to come.
